






The Microsoft Entra Private Network Connector is a lightweight on-premises software agent that enables Microsoft Entra Private Access to forward Global Secure Access (GSA) client traffic to internal resources. In environments with multiple connectors, traffic is normally distributed across available connectors in a connector group. While this improves resiliency and load distribution, it can create challenges for applications that rely on a consistent connector source IP address.
Stateless Connectors
By default, requests are distributed randomly among the available connectors in a connector group. Traffic forwarded to the internal resource uses the connector server’s IP address as its source. Consequently, separate connections from the same user and device can reach the application through different connectors. Importantly, session state is not shared among connectors in a connector group. As such, applications that associate session state with the source IP address may reject or interrupt these connections.
Why Session Persistence Matters
In some scenarios, an internal application might allow access only from specific connector IP addresses or associate an authenticated session with the source IP address. Random connector selection can cause subsequent connections to arrive from a different address, potentially interrupting the session. Session persistence reduces this risk by consistently using the same connector for the user and device.
Session Persistence
Microsoft recently introduced session persistence for Entra Private Access applications. When enabled, requests from the same user and device are consistently routed to the same connector for the duration of the session. This helps maintain a consistent connector egress IP address for applications that depend on source IP addresses for authentication, authorization, or session management.
Traffic Routing
The connector traffic routing method is configured on a per-application basis. Traffic routing methods can be defined on Quick Access or Enterprise applications, and the setting can be configured on the Network access properties tab. Administrators have two options: Random or Session Persistence.
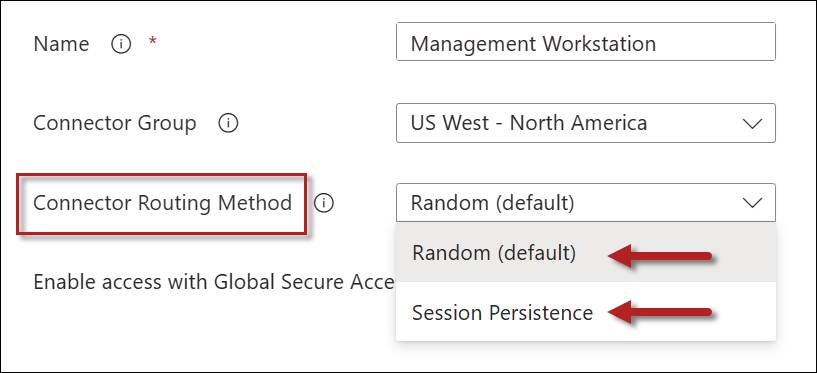
Random
This is the default behavior for the Private Network connector. All new connections are distributed randomly among connectors in the connector group.
Session Persistence
Selecting the Session Persistence option consistently routes requests from the same user and device to the connector on which the session was established.
Connector Routing Method Comparison
The following table summarizes these configuration options.
| Routing Method | Benefits | Considerations |
| Random | Better distribution across connectors in a connector group | Source IP address may change between connections |
| Session Persistence | Consistent connector egress IP address | May not distribute sessions as evenly as the Random method |
Failover
If the preferred connector becomes unavailable, subsequent traffic may be routed through another available connector. Applications that depend on the connector’s source IP address might require the user to establish a new session.
GSA Applications Only
Session persistence applies only to Global Secure Access applications. It is not supported for applications published using Microsoft Entra Application Proxy.
Summary
By default, Microsoft Entra Private Access distributes requests randomly among available connectors. Although this provides load distribution, it can create problems for applications that depend on a consistent connector source IP address. Session persistence addresses this issue by consistently routing traffic from the same user and device through the same connector for the duration of the session. This feature applies only to Global Secure Access applications and is not supported for Microsoft Entra Application Proxy applications.
Additional Information
Entra Private Network Connector Overview and Deployment Strategies
Preventing Port Exhaustion on Entra Private Network Connector Servers
 The Internet Key Exchange version 2 (IKEv2) is the protocol of choice for Always On VPN deployments where the highest level of security is required. Implementing Always On VPN at scale often requires multiple VPN servers to provide sufficient capacity and to provide redundancy. Commonly an Application Delivery Controller (ADC) or load balancer is configured in front of the VPN servers to provide scalability and high availability for Always On VPN.


